
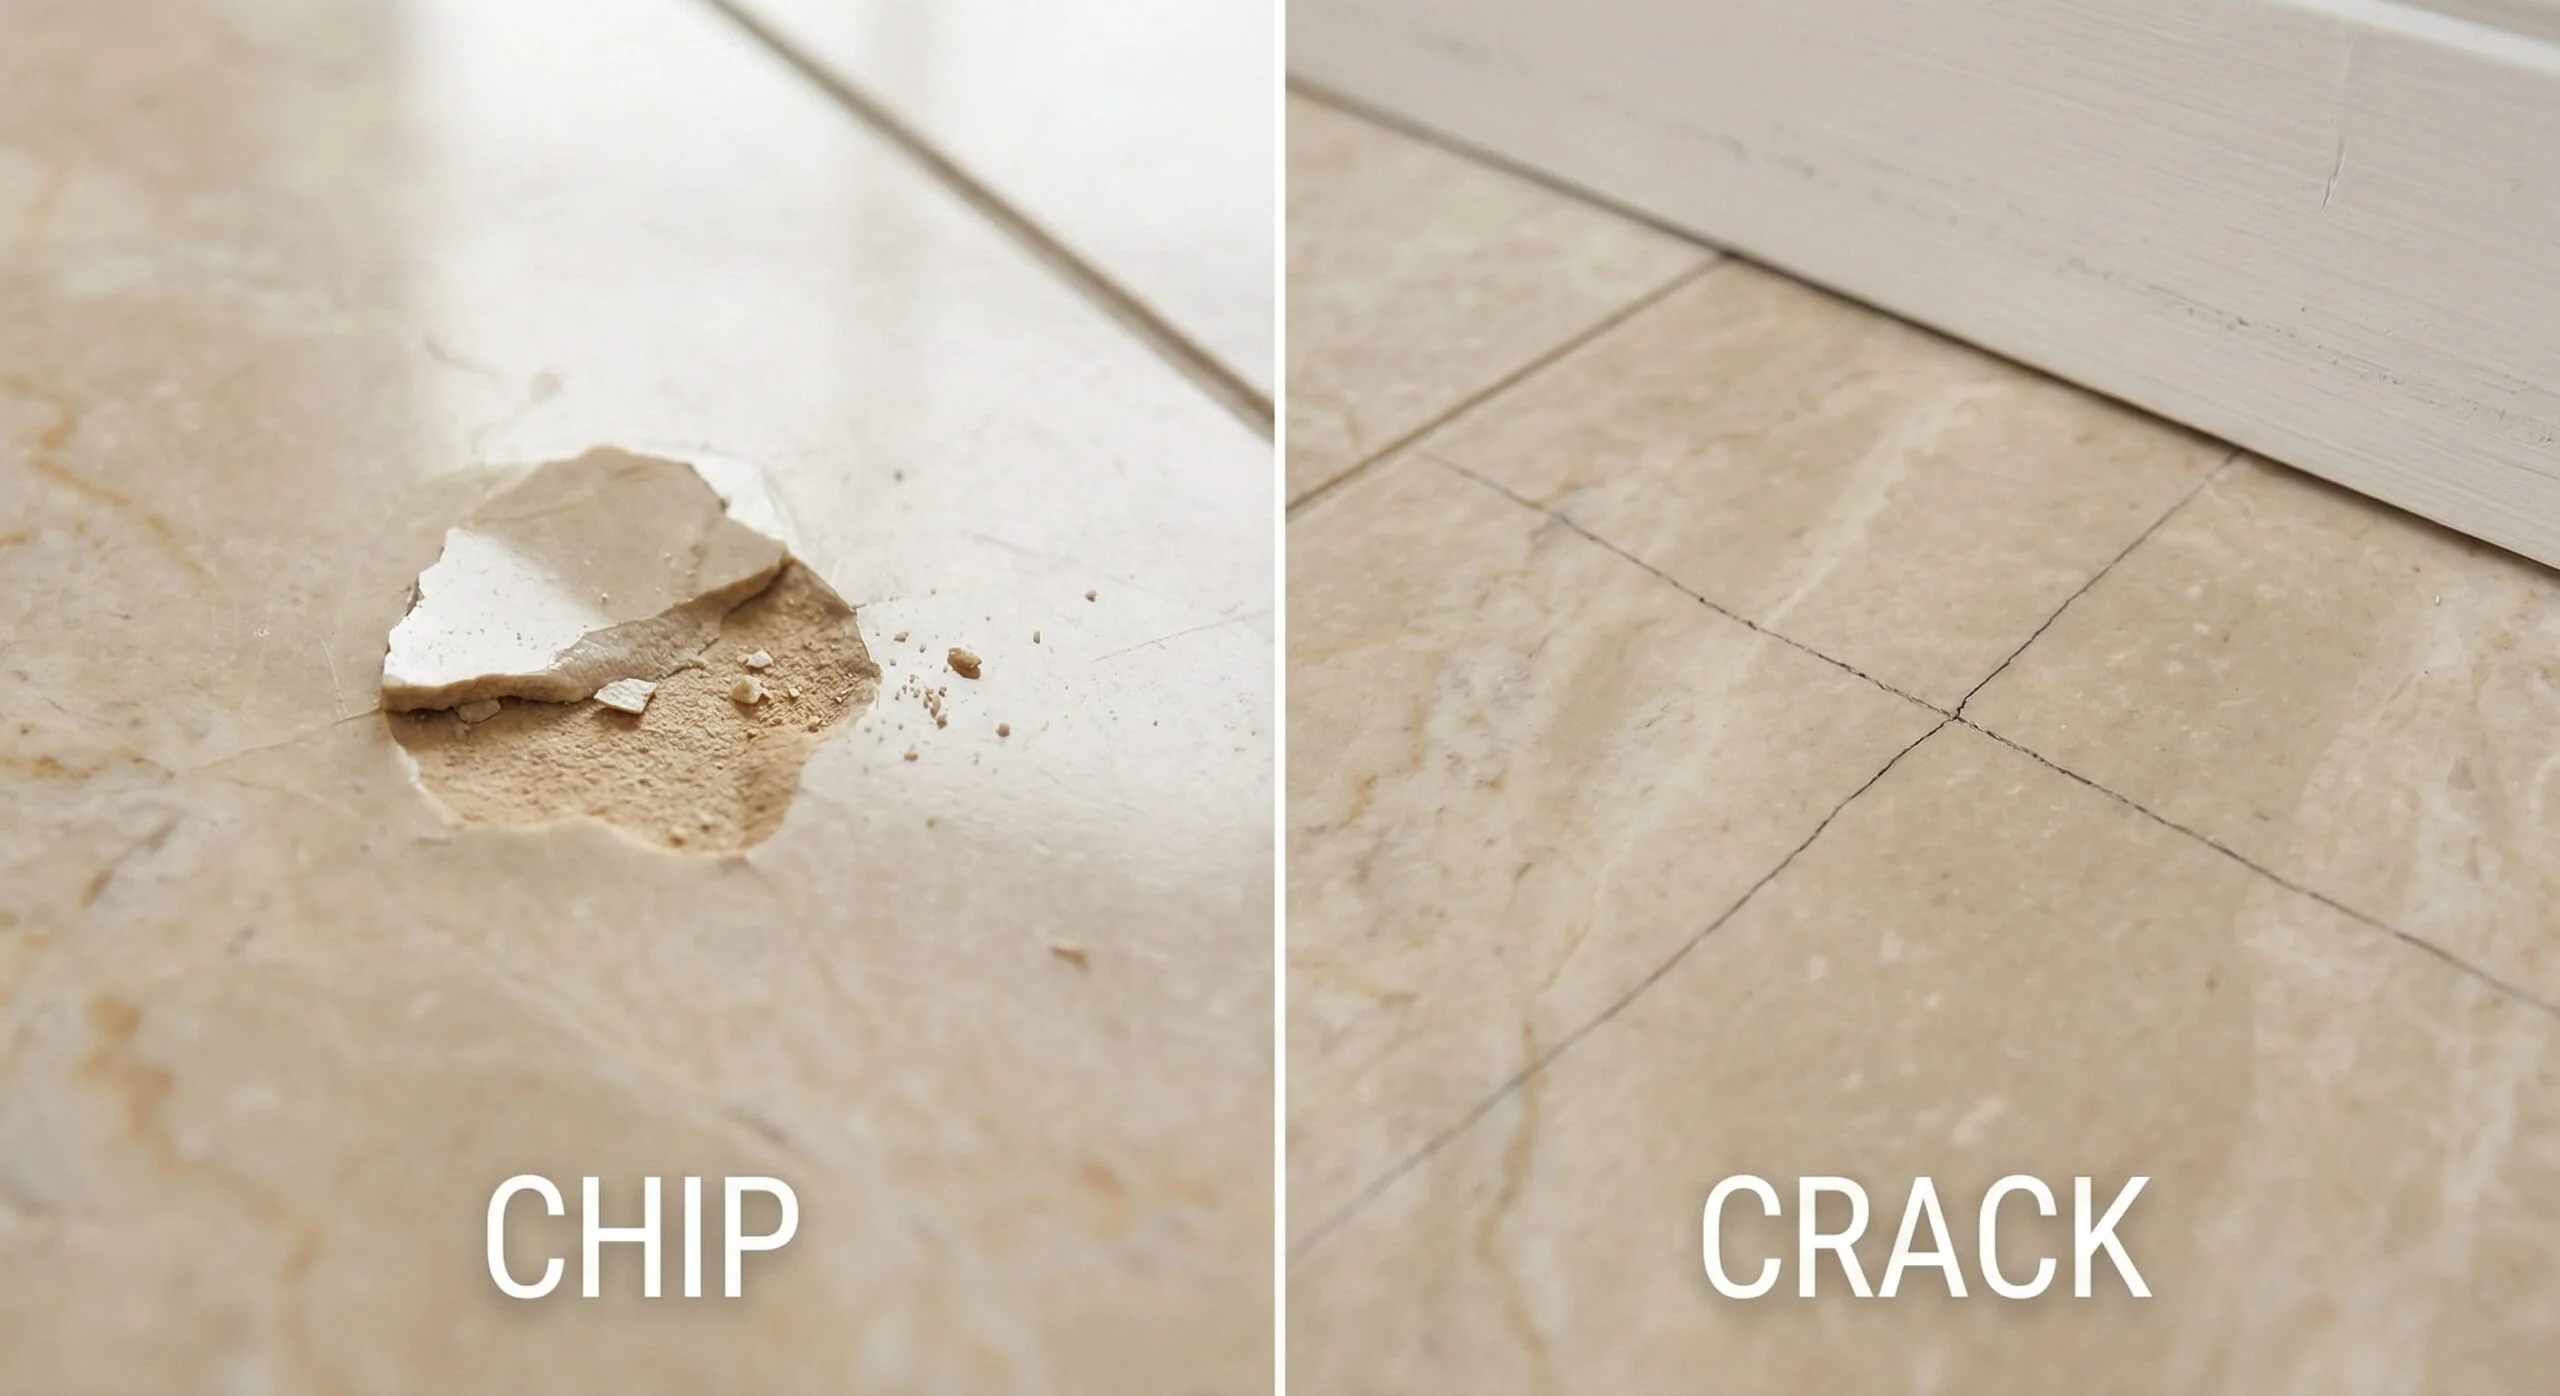
A small chip in a ceramic floor tile can make an otherwise good floor look worn or neglected. The damage may be only a few millimeters wide, but because floor tiles are often visible at eye level, even a tiny missing piece can stand out.
The good news is that a small, shallow chip does not always require replacing the entire tile. When the tile is otherwise firmly installed and the damaged area is limited, a suitable tile-repair product can often fill the missing section and restore a more even appearance.
The important part is knowing what you are repairing. A small surface chip is different from a tile with a long crack, loose edges, movement, or damage extending through the tile. This guide explains how to inspect the damage, prepare the ceramic surface, fill the chip, smooth the repair, and decide when replacement is a better option.
Is the Tile Suitable for a Small Chip Repair?
Before buying any repair material, inspect the tile carefully.
A simple cosmetic repair is most appropriate when the tile is still firmly attached to the floor and the damage is limited to a small area. The chip should not extend through the full thickness of the tile.
Press gently around the damaged area. The tile should not move, rock, or make a hollow movement that suggests it has become loose.
Look closely for cracks extending away from the chip. A chip accompanied by a long crack may indicate damage that is more extensive than the missing surface material.
Also check the edges of the chip. If they are stable and there are no loose fragments, preparation will be easier.
If the tile is cracked across a large portion of its surface, badly broken, or moving underfoot, a filler repair may only hide the problem temporarily. Tile replacement may be the more sensible solution.
What Causes Small Chips in Ceramic Floor Tiles?
Ceramic floor tiles can chip when a hard object is dropped onto them, when furniture is dragged across the surface, or when something strikes an exposed edge.
Chips commonly appear near corners and edges because these areas can be more vulnerable to impact.
The cause matters because repairing the chip without changing the conditions that caused it can lead to another damaged area.
For example, repeatedly dragging heavy furniture across the floor can create new chips even after an otherwise successful repair.
What You Need for the Repair
For a small ceramic-tile chip, you generally need only a few materials and tools:
- Ceramic or tile repair filler suitable for floor use
- Fine-grit sandpaper or an abrasive pad, if recommended for the repair material
- A small putty knife, plastic spreader, or applicator
- Clean cloths
- Mild household cleaner
- Painter’s tape
- Disposable gloves
- Matching touch-up paint or tile colorant, if the repair product requires it
Some repair kits contain the filler, colorants, applicator, and finishing tools together.
Choose a product according to the manufacturer’s instructions and the type of tile surface. A product designed for a wall may not have the durability required for a floor that receives regular foot traffic.
Do not automatically choose the strongest or most expensive product. The important thing is that it is appropriate for ceramic tile and the location of the repair.
Step 1: Clean the Damaged Tile
Start by cleaning the tile around the chip.
Remove dust, dirt, grease, and cleaning residue with a suitable mild cleaner. Pay particular attention to the inside of the chipped area because debris can interfere with the repair material.
Use a clean cloth to remove the loosened dirt.
The surface needs to be clean and dry before the filler is applied. If the area remains damp, wait until it has dried completely.
Do not begin by aggressively sanding the whole tile. Most small chips only require localized preparation.
Step 2: Remove Loose Ceramic Fragments
Look carefully inside the damaged area.
If there are tiny pieces of ceramic that are already loose, remove them carefully. Do not deliberately break away stable material simply to make the chip larger.
The objective is to create a clean, stable area for the repair material.
Run a fingertip gently around the damaged edge after cleaning. It should feel firm rather than flaky or unstable.
If the chip continues to crumble when touched, stop and reassess the damage. You may be dealing with a larger structural problem in the tile.
Step 3: Protect the Surrounding Tile
Apply painter’s tape around the damaged area if you want extra protection while filling the chip.
Leave the damaged section exposed but cover the surrounding finished surface.
This is particularly useful when the repair product is difficult to remove after it cures.
Keep the tape close enough to protect the tile without interfering with your ability to smooth the filler.
Step 4: Prepare the Repair Material
Read the instructions supplied with your ceramic-tile repair product before mixing or applying it.
Some products are ready to use, while others require two components to be combined. The working time can also vary.
Prepare only the amount you need for the small repair.
Do not mix a large quantity and leave it sitting while you prepare the tile. Some repair compounds begin curing relatively quickly.
If the product requires a colorant, test the color on a disposable surface first when possible. Ceramic tile colors can be difficult to match exactly, particularly when the tile has a textured or patterned finish.
Step 5: Apply a Small Amount of Filler
Use a small applicator or plastic spreader to press the repair material into the chip.
Work the material into the deepest part first.
For a small chip, it is better to apply a controlled amount than to cover a large area with excess material.
Press gently enough to fill the cavity completely without spreading unnecessary filler across the surrounding tile.
The repair should slightly fill the missing area rather than leave a visible depression.
Step 6: Level the Repair
Once the chip is filled, carefully level the repair material with the surrounding tile.
Use the edge of a small plastic spreader or the tool supplied with the repair product.
Try to leave the repaired area as close as possible to the original surface level.
Do not repeatedly scrape the same area after the filler begins setting. Follow the product’s working-time instructions.
A repair that is slightly too high can often be corrected according to the product instructions. A repair that is too low may require another application after the first layer has cured.
Step 7: Allow the Repair to Cure
This is one of the easiest steps to rush.
Leave the repair undisturbed for the curing period specified by the product manufacturer.
Do not walk over it simply to see whether it has hardened.
Avoid wet cleaning until the repair material has reached the required cure or drying stage.
The fact that the surface feels dry does not necessarily mean the material has reached its full intended hardness.
Step 8: Smooth the Repaired Area if Required
After the repair has cured sufficiently, inspect the surface from several angles.
If the product instructions allow sanding or smoothing, use a fine abrasive carefully on the repaired area.
The goal is to remove a slight raised edge without scratching the surrounding glazed ceramic.
Use light pressure and check the surface frequently.
Do not aggressively sand a glossy glazed tile. The surrounding finish may be permanently dulled or scratched.
If the repair product does not require sanding, follow its specified finishing method instead.
Step 9: Match the Color and Finish
A filled chip can still be noticeable if the color is wrong.
Some repair materials are available in different colors, while others can be tinted or painted after curing.
When matching the repair, look at the tile under the lighting normally used in the room. A color that appears correct in bright daylight can look different under warm indoor lighting.
For patterned tiles, an exact match may not be possible. In that case, concentrate on making the repaired area blend naturally rather than trying to reproduce every tiny detail.
Avoid covering a large area of the tile with paint simply to hide a very small repair.
Step 10: Remove the Tape and Clean the Area
If you used painter’s tape, remove it carefully according to the repair product’s instructions.
Clean away any residue around the repair without disturbing the newly finished surface.
Once everything has cured properly, inspect the tile while standing normally.
The repair does not need to be completely invisible from a few centimeters away to be successful. The goal is to restore the damaged area and make it blend reasonably well with the surrounding tile.
What If the Chip Is on the Edge of the Tile?
Edge chips need slightly more attention than shallow chips in the middle of the tile.
The missing section may have a shape that makes the repair material harder to keep in position.
Build the repair gradually if the product instructions allow it. Trying to fill a large edge void with one excessive application can make the material sag, spread, or cure unevenly.
Once cured, carefully shape the repaired edge to follow the original profile.
If the edge is badly broken or a large portion is missing, replacing the tile may produce a better and more durable result.
What If the Tile Has a Hairline Crack?
Do not treat every crack as though it were just a chip.
A small missing corner combined with a crack extending across the tile can indicate that the tile has suffered more extensive impact damage.
A filler can improve the appearance, but it does not restore the tile to its original structural condition.
If the crack is growing, crosses a large portion of the tile, or the tile moves under pressure, investigate the cause before deciding on a cosmetic repair.
How to Tell Whether the Repair Worked
After the repair has fully cured, check it from several angles.
Run a clean fingertip lightly across the repaired area. It should not have a sharp raised edge that could catch dirt or feel noticeably different from the surrounding surface.
Look at the color under normal room lighting.
Also check whether the tile itself remains firmly attached to the floor.
A successful cosmetic repair should remain stable during normal use. If the filler quickly cracks, falls out, or separates from the tile, investigate why rather than repeatedly applying new material.
Common Mistakes When Repairing Ceramic Tile Chips
Filling a dirty chip
Dust and grease can interfere with adhesion. Cleaning the damaged area first gives the repair material a better surface to work with.
Using ordinary wall filler
A floor tile is exposed to repeated foot traffic and cleaning. A generic wall filler may not be designed for that environment.
Choose a repair material specifically intended for the surface and use described by its manufacturer.
Applying too much filler
Large amounts of excess material make leveling and color matching harder.
Start with a controlled amount and build up the repair if the product allows it.
Sanding the glazed surface
Ceramic tile can have a hard finished surface that should not be aggressively sanded.
Keep abrasive work localized to the repair material when the manufacturer’s instructions permit sanding.
Walking on the repair too soon
A surface can appear dry while still curing.
Follow the stated cure time and any instructions concerning foot traffic or moisture.
Ignoring a cracked or loose tile
A chip is not always purely cosmetic.
If the tile is moving, badly cracked, or repeatedly developing new damage, investigate the underlying issue before relying on a filler.
When Should You Replace the Tile Instead?
A repair is most useful when the damage is small and the tile remains structurally sound.
Replacement becomes more attractive when the tile has a large crack, extensive missing material, loose sections, significant edge damage, or damage that keeps returning.
Replacement may also be preferable when the tile is in a highly visible location and achieving an acceptable color match would be difficult.
If spare tiles from the original installation are available, replacement can sometimes provide a much closer visual match than attempting to recreate a damaged finish.
Before replacing a tile, however, make sure the cause of the damage is understood. A tile can crack again if the conditions that damaged it have not been addressed.
How to Prevent More Ceramic Tile Chips
Small changes in how the floor is used can reduce future impacts.
Use care when moving heavy furniture. Lift items when practical instead of dragging them directly across the tile.
Protect furniture legs with suitable pads, particularly in areas where chairs or tables are moved frequently.
Keep hard objects from being dropped onto the floor.
During cleaning, avoid striking the tile edges with vacuum heads or other equipment.
It is also useful to inspect the floor occasionally. A small chip can be repaired more easily when the surrounding tile is still stable and intact.
Frequently Asked Questions
Can a small chip in a ceramic floor tile be repaired?
Yes. A small cosmetic chip can often be filled with a repair material designed for ceramic tile, provided the tile itself remains firmly installed and is not significantly cracked.
Can I use epoxy to repair a ceramic tile chip?
Some epoxy-based products are made for repairing ceramic and other hard surfaces, but suitability depends on the specific product and the location of the repair. Check that the product is intended for ceramic tile and floor use before applying it.
Will a tile chip repair be completely invisible?
Not always. The final appearance depends on the tile’s color, pattern, texture, glaze, lighting, and the quality of the color match. A good repair can make a small chip much less noticeable without necessarily making it disappear completely.
Should I sand a ceramic tile before repairing a chip?
Only prepare or sand the area as directed by the repair product manufacturer. Avoid sanding the surrounding glazed surface because aggressive abrasion can permanently change its appearance.
What if the chip keeps breaking or the filler falls out?
Stop applying more filler and inspect the tile. The surface may be unstable, contaminated, moving, or more extensively damaged than it first appeared. A cracked or loose tile may need replacement rather than another cosmetic repair.
Can I repair a chip near the edge of a floor tile?
Small edge chips can sometimes be repaired, although they can be more difficult to shape and keep in place. If a large portion of the edge or corner is missing, replacing the tile may provide a better result.
How long should I wait before walking on the repaired tile?
Follow the curing and foot-traffic instructions provided with your specific repair product. Do not assume that a repair is ready simply because its surface feels dry.
Final Thoughts
A small chip does not necessarily mean a ceramic floor tile needs to be removed. When the tile is firmly installed and the damage is limited, careful cleaning, proper preparation, a suitable tile-repair material, and patient curing can improve the appearance without replacing the entire tile.
The repair is mainly about controlling the damaged area. Keep the filler localized, avoid damaging the surrounding glaze, and give the material enough time to cure.
Most importantly, know when the problem is larger than a cosmetic chip. Cracks, movement, repeated damage, or extensive missing material are signs that filling the surface may not be enough. In those situations, investigating the underlying cause and considering tile replacement is usually the more sensible approach.