
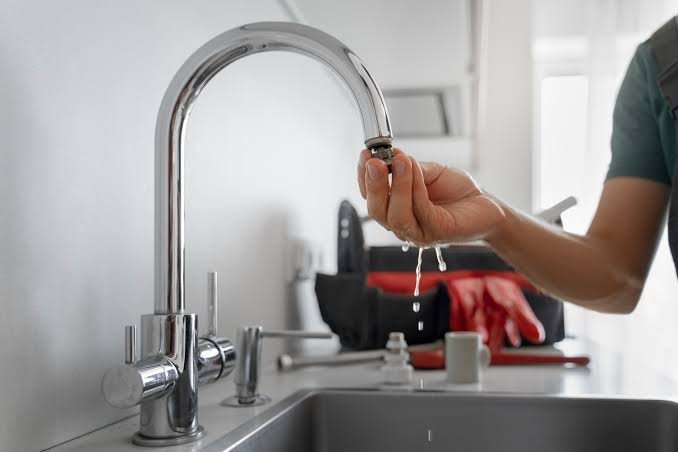
A kitchen tap that suddenly produces only a weak stream can make simple jobs such as filling a pot, rinsing dishes, or washing vegetables frustrating. The good news is that low flow at one kitchen tap does not always mean there is a serious plumbing problem.
In many cases, the restriction is close to the tap itself. A clogged aerator, partially closed shut-off valve, blocked hose, or problem with the tap cartridge can reduce the amount of water coming through. If other taps in the home are also affected, the cause may be farther upstream.
The key is to work out whether the problem is limited to the kitchen tap or affects the wider water supply. From there, a few safe checks can often identify the likely cause.
What Low Water Pressure at a Kitchen Tap Usually Means
People often use “low water pressure” to describe any tap that produces less water than expected. Technically, water pressure and water flow are not exactly the same thing.
Your home’s water pressure is the force pushing water through the plumbing. The amount of water that actually comes from the tap also depends on restrictions in the pipes, valves, hoses, aerators, and the tap itself.
For example, if the water pressure elsewhere in the house feels normal but the kitchen tap has only a thin stream, the problem is more likely to be a local restriction than a whole-house pressure problem.
A useful first check is simple: turn on another tap, such as the bathroom basin or kitchen sink’s second outlet if one is available. Compare the flow.
If only the kitchen tap is weak, start with the tap and its connections. If several taps suddenly have poor flow, investigate the wider supply before taking the kitchen tap apart.
Common Reasons a Kitchen Tap Has Weak Flow
A blocked tap aerator
The small fitting at the end of many kitchen taps is called an aerator. It mixes water with air and helps create a smoother stream.
Mineral deposits, small particles, rust, or debris from plumbing work can collect inside it. Over time, the openings can become restricted.
This is one of the easiest causes to check because the restriction is located at the end of the tap.
If the flow was previously normal and gradually became weaker, a dirty aerator is worth checking early.
The shut-off valve is not fully open
Most kitchen sinks have one or more shut-off valves underneath the sink. These allow the water supply to the tap to be isolated during repairs.
A valve can sometimes be left partly closed after previous plumbing work. A partially open valve can restrict flow.
Look underneath the sink and check whether the relevant valve appears to be fully open. Do not force a stiff or damaged valve. If turning it produces leaking, unusual resistance, or signs of damage, stop and consider calling a plumber.
A kinked or restricted flexible hose
Many modern kitchen taps connect to the water supply with flexible hoses. These can become bent sharply or trapped against the cabinet.
A severely kinked hose can restrict water movement. This can happen after cleaning supplies are moved around underneath the sink or after plumbing work.
With the water supply left alone, look at the hoses and check whether one has a sharp bend or is being crushed by something stored in the cabinet.
Do not pull aggressively on the hose or connections.
Debris inside the tap
If the aerator is clean but the flow remains weak, debris may be caught farther inside the tap.
This can happen after work has been carried out on the plumbing system. Small particles can travel through the water line and become lodged in internal components.
Depending on the tap design, debris may affect a cartridge, valve, or internal passage.
Taking a tap apart is not always necessary for a beginner. If basic external checks do not identify the problem, it may be safer to have the tap inspected rather than forcing components apart.
A clogged or failing cartridge
Single-lever mixer taps often use a cartridge to control water flow and temperature. Mineral deposits or internal wear can affect how well water passes through the cartridge.
A cartridge problem may be more likely if the tap has other symptoms, such as unusual movement of the handle, difficulty controlling temperature, dripping, or a gradual reduction in flow.
Replacing a cartridge can be a reasonable DIY repair for someone comfortable with basic plumbing, but the exact procedure varies considerably between tap designs.
Problems with the wider water supply
If several taps in the property have low flow, the kitchen tap itself may not be responsible.
Possible causes can include a supply issue, a partially closed main valve, plumbing restrictions, or temporary work affecting the local water network.
If the problem appeared suddenly and affects multiple fixtures, check whether your water provider has reported supply or maintenance work. In an apartment building, the issue could also be associated with shared plumbing.
What You Can Check Yourself
Start with the easiest checks rather than immediately removing plumbing components.
1. Compare another tap
Turn on a bathroom or utility-room tap and compare its flow with the kitchen tap.
If the other tap works normally, the problem is probably local to the kitchen.
If several taps have weak flow, avoid assuming that replacing the kitchen tap will solve the issue.
2. Check the tap aerator
Look at the end of the tap where the water comes out. If there is a removable aerator, carefully remove it according to the tap manufacturer’s design.
Place the small parts somewhere safe so they do not disappear down the sink.
Rinse away loose debris and inspect the openings. Mineral buildup may be visible as a crusty deposit around the small holes.
If the aerator has removable parts, clean them carefully rather than poking aggressively through the openings with a sharp object that could damage them.
Once clean, reinstall the aerator and test the flow.
If the stream improves noticeably, you have probably found the restriction.
[Internal link opportunity: article about cleaning and maintaining kitchen taps]
3. Look under the sink
Check the water supply valves and flexible hoses.
Look for:
- A valve that appears partly closed
- A sharply bent supply hose
- A hose being squeezed by stored items
- Signs of leaking around a connection
- Corrosion or obvious damage
Move stored items away from the plumbing so nothing is pressing against the hoses.
Do not dismantle a connection simply because it looks old. An old fitting may begin leaking when disturbed.
4. Check whether hot or cold water is affected
Turn the tap to cold and observe the flow. Then test hot water separately.
If cold water is weak but hot water is normal, or vice versa, the restriction may be associated with one side of the supply or a component inside the tap.
If both hot and cold water are weak, the aerator, tap body, supply hoses, or another common restriction becomes more likely.
This comparison can give you useful information before you start replacing parts.
How to Clean a Blocked Tap Aerator
If the aerator is visibly dirty, cleaning it is usually a sensible first repair.
First, make sure you can remove the fitting without damaging the tap’s finish. If it can be loosened by hand, remove it carefully. If a tool is required, protect the surface and avoid applying excessive force.
Rinse the aerator under clean water. Remove loose sediment and inspect the small screen or openings.
For mineral deposits, soaking the removable parts in an appropriate descaling solution can help loosen the buildup. Follow the product instructions and make sure the material is suitable for the aerator.
Rinse the parts thoroughly before reinstalling them.
When the aerator is back in place, turn the tap on slowly and check the stream and the connection for leaks.
If cleaning makes no difference, the blockage may be elsewhere.
What If Cleaning the Aerator Does Not Help?
If the aerator is clean and the shut-off valve and hose appear normal, the next step depends on the symptoms.
A tap with a removable cartridge may need internal cleaning or cartridge replacement. Before attempting this, identify the tap model if possible and follow the manufacturer’s instructions.
If you do remove any internal component, the water supply should be isolated first. Open the tap afterward to release remaining water pressure.
Keep small parts in order as they are removed. Some tap components look similar but need to be reinstalled in a particular orientation.
If you are unsure how the tap is assembled, stopping before damage occurs is better than forcing a part.
For a relatively inexpensive tap, replacing the entire fitting may sometimes be more practical than repairing a badly worn internal mechanism. For a quality tap, however, a replacement cartridge or manufacturer’s repair kit may be available.
Why the Problem Can Return
Mineral deposits can build up repeatedly in areas with harder water. Debris can also appear after plumbing work, and older valves or tap components can gradually deteriorate.
Regularly looking underneath the sink can help you spot problems before they become larger repairs. You do not need to dismantle the plumbing during routine maintenance.
Instead, watch for changes in flow, leaks, corrosion, unusual noises, or hoses that have shifted position.
[Internal link opportunity: article about finding early signs of water damage under kitchen sinks]
If a new tap develops poor flow soon after installation, installation debris or a supply connection issue may deserve attention. If an older tap slowly loses flow over a long period, mineral buildup or internal wear may be more likely.
Common Mistakes to Avoid
One common mistake is immediately replacing the entire tap without checking the aerator. A simple blockage can make a perfectly usable tap appear faulty.
Another mistake is forcing a shut-off valve that has become stiff. Older valves can leak or fail when excessive force is applied.
Avoid using sharp tools to aggressively enlarge or scrape small aerator openings. Damaging the fitting can affect how the water stream behaves.
Do not ignore a leak simply because the water pressure is low. A leaking connection can worsen and cause damage inside the cabinet.
It is also unhelpful to assume that low flow at one tap means the home’s main water pressure needs to be increased. If the restriction is inside the tap, increasing supply pressure elsewhere will not fix the underlying problem.
When You Should Call a Professional
A plumber is a sensible choice when the cause is unclear or the problem goes beyond a simple external check.
Professional help is particularly appropriate if:
- Several fixtures have suddenly lost water flow.
- A shut-off valve is damaged, leaking, or cannot be operated safely.
- You find a leaking or badly corroded pipe or connection.
- Water is appearing inside the cabinet or behind walls.
- The tap needs internal repair that you are not comfortable performing.
- The water flow remains poor after basic checks.
- The property has a more complicated plumbing system.
- You suspect a problem with shared plumbing in an apartment building.
Apartment residents should also check their tenancy or building arrangements before carrying out plumbing changes. Some buildings require maintenance work to be handled by building management or an approved contractor.
If water is leaking significantly, shut off the appropriate water supply if you can do so safely and arrange professional assistance.
How to Prevent Low Flow Problems
You cannot prevent every plumbing restriction, but a few simple habits can reduce avoidable problems.
Keep the area beneath the sink reasonably clear so bottles, boxes, and cleaning products do not press against flexible supply hoses.
Pay attention to gradual changes in water flow. A small reduction is easier to investigate than a tap that suddenly stops producing a useful stream.
Clean the aerator when it becomes dirty rather than waiting until the openings are heavily blocked.
After plumbing work, watch the tap for changes in flow and check visible connections for leaks.
If your water supply regularly contains noticeable sediment or mineral deposits, ask a qualified plumber about suitable maintenance options rather than installing equipment without understanding the cause.
Frequently Asked Questions
Why is only my kitchen tap low in pressure?
If other taps have normal flow, the restriction is probably local to the kitchen tap. A clogged aerator, partially closed valve, kinked hose, or tap cartridge problem are possible causes.
Why does my kitchen tap have low pressure on both hot and cold water?
When both sides are affected, check the aerator first. If it is clean, inspect the visible supply connections and valves. A restriction inside the tap is another possibility.
Can a dirty aerator really reduce water flow?
Yes. Mineral deposits and debris can block some of the small openings in an aerator. This reduces the amount of water that can pass through it.
Should I replace my kitchen tap if the water pressure is low?
Not necessarily. Replacing the tap will not solve a wider supply problem or a restriction elsewhere in the plumbing. Check the aerator, valves, hoses, and other fixtures first.
Why is my kitchen tap suddenly weaker than yesterday?
A sudden change can be caused by debris entering the tap, a valve being moved, plumbing work, or a wider supply problem. Compare another tap to determine whether the issue is isolated.
Can low water pressure damage a kitchen tap?
Low flow itself does not necessarily mean the tap is being damaged. However, a sudden change can indicate a restriction or plumbing problem that deserves investigation, particularly if there are leaks or other unusual symptoms.
Final Thoughts
A kitchen tap with weak flow is often easier to troubleshoot than it first appears. Start by comparing the kitchen tap with other fixtures, then check the aerator, visible valves, and flexible hoses.
If the problem affects only one tap, focus on that tap and its immediate connections. If several fixtures are affected, look beyond the kitchen before replacing anything.
Simple cleaning or adjustment may solve a minor restriction, but damaged valves, leaking connections, persistent low flow, and problems within shared or concealed plumbing are better handled by a qualified professional. A careful diagnosis is usually more useful than replacing parts based on guesswork.