
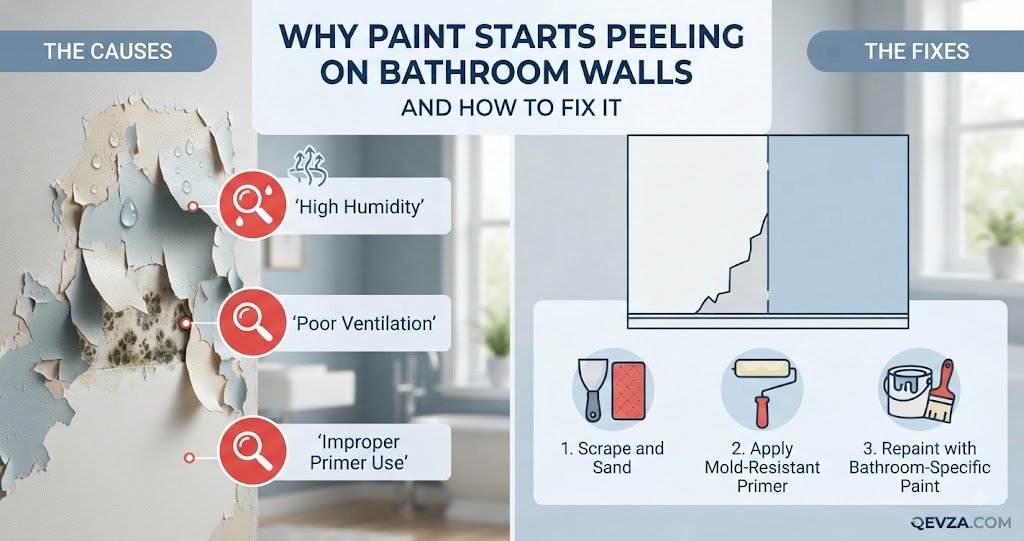
Peeling paint in a bathroom is frustrating because a repair that looks perfect today can start failing again a few months later. You may notice small flakes near the ceiling, bubbling around a shower, or a larger section of paint lifting away from the wall.
The important thing is not to treat the peeling paint as the whole problem. In a bathroom, moisture can come from shower steam, condensation, plumbing leaks, water splashing onto the wall, or a surface that was poorly prepared before it was painted.
If you simply scrape the loose paint and add another coat, the same problem may return.
The better approach is to find out why the paint failed, make sure the wall is dry and sound, repair the damaged surface, and then improve moisture control before repainting.
Why Bathroom Paint Peels
Paint needs a clean, sound and properly prepared surface to stay attached. When that bond becomes weak, the paint can blister, crack, flake or peel.
Bathrooms create more difficult conditions than many other rooms because showers and baths release moisture into the air. If that moisture is not removed properly, it can condense on cooler walls and ceilings.
Water can also reach the wall through a leaking pipe, failed seal around a fixture, damaged caulk, or water entering from another part of the building.
The location of the peeling can provide an important clue.
If the problem is mainly above the shower, poor ventilation or repeated exposure to moisture may be involved. If it is concentrated around a sink, tub or pipe, splashing or a leak deserves closer attention. If the paint is peeling in one isolated area and the wall feels soft, the problem may be deeper than the paint itself.
Moisture problems should be corrected before repainting. The EPA specifically advises against painting wet or moldy surfaces because paint applied over them is likely to peel again.
First Find Out Where the Moisture Is Coming From
Before picking up a scraper, spend a few minutes inspecting the bathroom.
Look at the peeling area and ask when you normally notice moisture there. Does the wall become wet after someone showers? Is there condensation on nearby surfaces? Does the peeling continue even when the bathroom has not been used for several days?
Then check nearby plumbing.
Look under the sink. Examine the area around exposed pipes. Check the caulk around the bathtub or shower. Look for water stains, discoloration, swollen materials or damp areas.
A recurring brown or yellow stain deserves particular attention. It can indicate water coming from behind the painted surface rather than ordinary bathroom humidity.
If the peeling is on the ceiling, inspect the room above it when possible. A bathroom ceiling can be affected by moisture from the room itself, but water from plumbing or another source above should not be ruled out simply because the room is a bathroom.
Condensation or a Leak?
This is one of the most useful questions to answer before repairing the wall.
Condensation usually affects areas that become cool while the bathroom air is warm and humid. You may notice moisture after showers, especially when the room has poor air movement.
A leak is different. It may produce a damp patch, staining, swelling or peeling that continues even when the bathroom has not recently been used.
You do not need to diagnose the exact source with certainty before taking action. The goal is to avoid covering up evidence of an ongoing water problem.
If the wall remains damp, develops new stains, or you suspect a hidden plumbing leak, deal with the water problem first.
Check the Condition of the Wall Under the Peeling Paint
Once you understand the likely moisture source, examine the damaged area.
Press gently on the exposed wall with a clean finger.
A sound wall should feel firm. If the surface is soft, swollen, crumbly or unusually weak, stop treating it as a simple paint repair.
Paint may be the visible symptom while the underlying wall material has been damaged by water.
You should also look for signs of mold or other biological growth. Do not simply cover it with primer or paint. The EPA recommends cleaning mold from appropriate surfaces and drying them completely before painting.
If there is extensive mold, repeated moisture, significant water damage, or damaged wall material, getting professional help is safer than continuing with a cosmetic repair.
What You Need for a Small Peeling-Paint Repair
For a small area on a sound wall, the basic supplies may include:
- A paint scraper or stiff putty knife
- Fine- to medium-grit sandpaper or a sanding sponge
- A suitable wall-repair compound
- A clean cloth or sponge
- Primer appropriate for the surface
- Bathroom-suitable interior paint
- A brush or roller
- Protective gloves and eye protection
The exact products depend on the wall material and the paint manufacturer’s recommendations.
If the home is old and the existing paint may contain lead, take additional precautions before scraping or sanding. The EPA recommends treating paint in homes built before 1978 as potentially containing lead unless it has been shown otherwise.
Step 1: Remove the Peeling Paint
Start by removing paint that is already loose.
Use the edge of a scraper or putty knife to lift the flaking sections carefully. Work around the damaged area until you reach paint that is firmly attached.
Do not scrape aggressively just to make the repair area larger. The purpose is to remove failed material, not to strip the entire wall unnecessarily.
If paint continues coming away with very little pressure, keep investigating. A large amount of loose paint may indicate that the problem extends beyond the obvious spot.
Step 2: Smooth the Edge of the Damaged Area
After the loose paint has been removed, you may be left with a noticeable ridge between the bare area and the surrounding paint.
Lightly sand the transition so the edge becomes less noticeable.
You are not trying to remove every layer of paint from the wall. The goal is to create a stable surface that can be repaired without leaving a sharp step under the new paint.
Avoid creating unnecessary dust, particularly in a small bathroom. Follow the instructions for the products you are using and clean the area properly afterward.
Step 3: Clean the Surface
Bathroom walls can collect soap residue, dust and other deposits.
Clean the repair area according to the instructions for your wall and paint products. Allow it to dry completely before continuing.
This step matters because primer and paint cannot compensate for a contaminated surface.
Do not rush simply because the wall feels dry on the outside. If the underlying material has been exposed to significant water, it needs enough time to dry before it is sealed and painted.
Step 4: Repair Dents or Damaged Areas
If scraping the peeling paint has left shallow depressions or damaged sections, apply an appropriate wall-repair compound.
Use thin applications rather than trying to fill a deep area in one pass.
Allow the compound to dry according to the manufacturer’s instructions, then sand it gently until the repaired area blends into the surrounding surface.
If the wall material itself is swollen, crumbling or badly damaged, do not keep applying filler over it. The damaged material may need to be removed and replaced.
Step 5: Prime the Repaired Surface
Once the surface is clean, dry, smooth and stable, apply a primer suitable for the substrate and the paint system you plan to use.
Primer is particularly useful when part of the wall is bare and part is covered by an existing coating because the repaired area can absorb paint differently from the surrounding wall.
The correct primer depends on what you are painting over. Follow the product label rather than assuming that one primer works equally well for every wall material.
Let the primer dry fully before applying the finish coat.
Step 6: Repaint With a Bathroom-Suitable Product
Choose a paint that the manufacturer recommends for interior areas exposed to bathroom humidity.
Do not select a product simply because the label says it is washable or because it has a particular sheen.
Check the manufacturer’s intended use, preparation instructions and drying requirements.
Apply the paint evenly and allow each coat to dry as directed. Trying to apply another coat before the previous one has properly dried can interfere with the finish and the final durability.
If possible, keep the bathroom well ventilated while painting and during the drying period.
Why the Ceiling Often Peels First
A bathroom ceiling can receive a lot of warm, humid air during showers.
If the room has poor ventilation, that moisture can remain in the space and contribute to condensation and surface problems.
However, peeling on a ceiling does not automatically mean that humidity is the only cause.
A stain that repeatedly appears in the same location could indicate water coming from above. That is why the location and pattern of the damage matter.
If the ceiling is soft, stained, repeatedly wet or showing signs of water entering from another area, investigate the source before repainting.
Improve Bathroom Ventilation After the Repair
A successful paint repair can still fail if excessive moisture continues to build up in the bathroom.
Use the exhaust fan while showering and for a period afterward. If there is a suitable window, opening it can also help exchange humid indoor air when outdoor conditions allow.
The important point is to actually remove moist air from the room. The EPA recommends bathroom exhaust fans that vent outdoors rather than simply moving humid air into another enclosed part of the building.
If the fan is noisy but seems ineffective, clean the grille and check whether it is actually moving air. If ventilation remains poor, the fan may need servicing or replacement.
A bathroom that stays visibly damp for long periods deserves attention even after the paint looks good again.
Do Not Paint Over Mold or Damp Paint
One of the biggest mistakes is treating peeling paint as a cosmetic problem when moisture is still present.
Painting over a damp surface can hide the problem temporarily without solving it.
The same applies to visible mold. Clean the affected surface appropriately and make sure the moisture source has been addressed before repainting. EPA guidance specifically says not to paint or caulk moldy surfaces before cleanup and drying.
If mold is widespread, keeps returning, or is associated with water-damaged materials, consider professional assessment rather than repeatedly painting the same area.
What About Small Peeling Spots?
A tiny peeling spot does not always require repainting the entire bathroom.
If the underlying wall is dry and sound, the moisture problem has been addressed, and the surrounding paint is firmly attached, a localized repair may be enough.
The challenge is matching the existing finish.
A small patch can sometimes remain visible because the new paint has a slightly different color, sheen or texture from the older coating. If the repaired area is in a highly visible location, painting the entire wall from corner to corner may produce a more consistent result.
When You Should Not Repair It Yourself
Some bathroom paint problems are beyond a simple DIY touch-up.
Consider professional help if:
- The wall or ceiling feels soft or swollen.
- Water stains keep returning.
- You suspect a hidden plumbing leak.
- A large section of drywall or plaster is damaged.
- Mold covers a substantial area or keeps returning.
- Paint continues peeling after the moisture problem has been corrected.
- You cannot determine where the water is coming from.
- The repair involves potentially lead-based paint in an older home.
The goal is not simply to make the wall look better. It is to make sure the surface underneath is suitable for repair.
Common Mistakes That Make Bathroom Paint Peel Again
Painting Over Loose Paint
New paint cannot create a reliable bond with paint that is already separating from the wall.
Remove the loose material first.
Painting a Damp Wall
This is one of the easiest ways to repeat the same failure.
Give the wall enough time to dry, and make sure there is no continuing source of moisture.
Ignoring a Small Leak
A small leak can cause repeated paint failure even when the visible damage looks minor.
If the same area becomes stained or damp again, investigate the source.
Using Any Leftover Paint
A leftover can of ordinary wall paint may not be the right choice for a humid bathroom.
Check the product label and make sure it is intended for the conditions where you plan to use it.
Skipping Surface Preparation
Scraping, cleaning, repairing and priming may feel like extra work when the damaged area is small.
Those steps are what give the new coating a reasonable surface to bond to.
Assuming the Exhaust Fan Works Because It Turns On
A fan making noise does not necessarily mean that it is removing enough humid air.
Check its airflow and make sure it exhausts where it is supposed to.
A Simple Way to Diagnose the Problem
You can use this sequence before beginning any repair.
Paint peeling + wall is damp:
Find and correct the moisture source before painting.
Paint peeling + wall is dry and firm:
Remove loose paint, prepare the surface and repaint.
Paint peeling + wall is soft or swollen:
Investigate possible water damage before attempting a cosmetic repair.
Paint peeling + recurring brown or yellow stain:
Look for a leak or water entering from another location.
Paint peeling + visible mold:
Address the moisture problem and clean the affected surface appropriately before repainting.
Paint peeling + problem returns after a proper repair:
Do not keep adding paint. Reassess moisture, ventilation, surface condition and the previous coating.
How to Keep Bathroom Paint in Good Condition
After repairing the wall, focus on the conditions that caused the failure.
Use the bathroom exhaust fan during showers and afterward. Keep the room reasonably ventilated. Wipe standing water from surfaces where practical. Check caulk and seals around tubs, showers and sinks periodically.
Pay attention to small changes.
A tiny bubble, stain or lifted edge is easier to investigate than a large section of failed paint.
If you notice condensation repeatedly collecting on walls or other surfaces, treat it as a moisture-control problem rather than simply wiping it away each time. High indoor humidity and condensation are signs that ventilation or moisture control may need attention.
Frequently Asked Questions
Why is my bathroom paint peeling but the wall looks dry?
The visible surface may be dry even though the original problem was caused by repeated humidity, poor surface preparation, an incompatible coating or moisture that reached the wall at an earlier time.
Look at where the peeling occurs and whether it returns after showers or periods of high humidity.
Can I just sand the peeling paint and repaint?
Not if the surrounding coating is still loose.
Remove the failed paint first, then prepare the exposed surface. Sanding alone does not solve an underlying leak or moisture problem.
Should I repaint the whole bathroom?
Not necessarily.
If the problem is small and the surrounding coating is sound, a localized repair may be sufficient. If the existing paint is failing across several walls, however, repairing isolated spots may not provide a lasting result.
Why does paint peel around my shower?
The area around a shower receives more moisture than most bathroom surfaces. Poor ventilation, direct water exposure, damaged caulk, unsuitable paint or inadequate surface preparation can all contribute.
If the wall itself is getting wet, determine why before repainting.
Can I paint over a little mold?
It is better not to.
Clean the affected area appropriately, address the moisture source and allow the surface to dry before painting. EPA guidance specifically warns against painting over moldy surfaces.
How long should I leave the bathroom before using it after painting?
Follow the drying and recoat instructions on the paint and primer you purchased. Drying time varies with the product, temperature, humidity and airflow.
Do not assume that paint is fully cured simply because it feels dry to the touch.
Why does my bathroom ceiling keep peeling?
Repeated ceiling peeling can be related to moisture and poor ventilation, but it can also come from a leak above the ceiling.
If the same area repeatedly stains, feels damp or deteriorates after repair, investigate further rather than continuing to repaint it.
Final Thoughts
Peeling bathroom paint is usually a sign that something needs attention beneath the surface.
The most useful repair starts with finding the reason the coating failed. Check for condensation, poor ventilation, plumbing leaks, direct water exposure and problems with the wall itself.
Once the source has been addressed, remove the loose paint, prepare the surface, repair damaged areas, prime where appropriate and use a paint product intended for the conditions.
Most importantly, do not rush to cover the problem. A few extra minutes spent finding the cause can save you from scraping and repainting the same bathroom wall again later.