
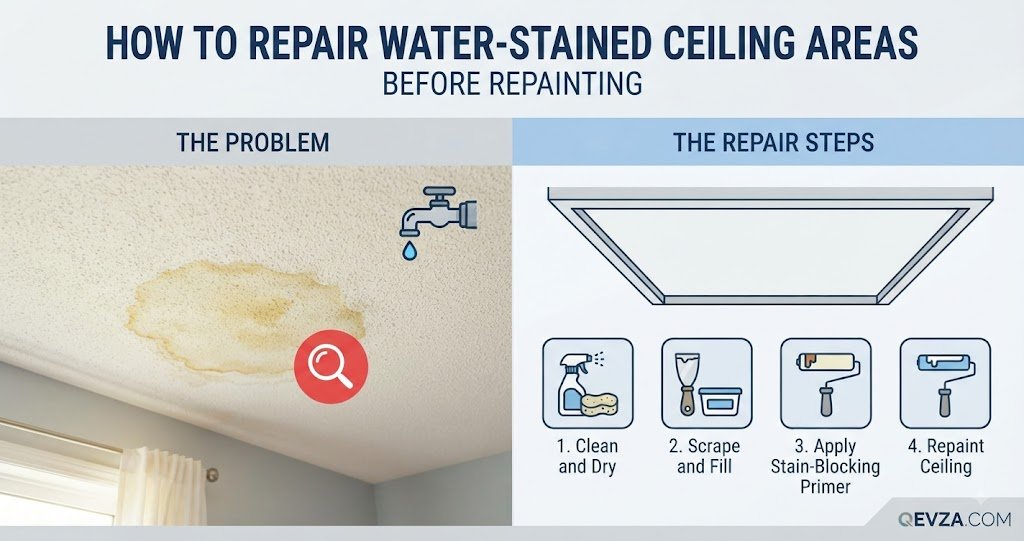
A water stain on your ceiling—that familiar yellow or brown ring—is more than an aesthetic blemish. It is a signal that moisture has migrated through your drywall, dissolved tannins in the paper backing, and deposited them on the surface.
Critical Warning: You cannot simply paint over a water stain. The tannins are water-soluble; if you apply standard latex paint directly over the mark, the stain will “bleed” through the new paint within hours or days. You must seal the surface with a specialized stain-blocking primer before applying your final coat.
Step 1: Confirm the Leak is Repaired
Before performing any cosmetic work, ensure the source of the water is fully resolved.
-
Test for dryness: The ceiling must be completely bone-dry to the touch. If the drywall feels soft, spongy, or crumbles under light pressure, it is structurally compromised and must be cut out and replaced with new drywall.
-
Check for active moisture: If you suspect an ongoing leak, use a moisture meter or monitor the stain for a few days. Painting over an active leak will only trap moisture, leading to mold growth inside your ceiling cavity.
Step 2: Clean and Prepare the Surface
Stains often carry surface contaminants like dust, grime, or mildew that prevent paint adhesion.
-
Scrape loose material: Use a putty knife to gently remove any bubbling paint or flaking drywall paper caused by the water damage.
-
Clean the area: Wipe the stain with a mixture of water and a mild dish soap or a dedicated degreaser. If you see black or green spots indicative of mold, scrub the area with a solution of one part bleach to three parts water.
-
Sand the edges: Once dry, use 120-grit sandpaper to “feather” the edges where you scraped the paint. This ensures a smooth transition between the repair area and the surrounding ceiling.
-
Dust off: Wipe away all sanding dust with a damp cloth or a tack cloth.
Step 3: Apply a Stain-Blocking Primer
This is the most important step in the entire process. Standard interior primer will not stop the stain from bleeding through.
-
Choose the right product: Use a solvent-based (oil-based) or shellac-based primer. These are “stain-killing” primers designed to encapsulate the water-soluble tannins.
-
Recommended: Products labeled as “stain-hiding” or “oil-based primer/sealer” (e.g., KILZ Original or BIN Shellac-Based Primer).
-
-
Application: Apply a thin, even coat over the stain. Extend the primer at least 2 to 3 inches beyond the edges of the original water ring to ensure complete coverage.
-
Cure time: Follow the manufacturer’s drying instructions. Oil-based and shellac primers often dry quickly (30–60 minutes), but they release fumes, so ensure the room is well-ventilated.
Step 4: Repaint the Ceiling
Once the primer has fully cured, you can proceed with your topcoat.
-
Test the coverage: If the stain is still faintly visible through the primer, apply a second coat of the stain-blocking primer.
-
Match the paint: Use the same ceiling paint used elsewhere in the room. If the ceiling has not been painted in years, the new paint will look brighter than the old, aged paint.
-
Blend the edges: To avoid “flashing” (a visible patch), roll the paint over the repaired area and feather the stroke outward into the surrounding ceiling while the paint is still wet. For the best result, repaint the entire ceiling section from corner to corner.
Common Mistakes to Avoid
-
Using water-based primer on heavy stains: Water-based primers can reactivate the tannins in the water stain, causing them to bleed through again. Stick to oil or shellac for the initial sealing coat.
-
Skipping the repair of soft drywall: Paint provides zero structural support. If the drywall was softened by water, patching the surface will not stop the material from sagging or eventually falling.
-
Painting over mold: Never paint over dark spots without killing the fungus first. The mold will continue to thrive behind your new paint layer.
When to Call a Professional
-
Extensive sagging: If a large section of the ceiling is bowing or sagging, the drywall tape and fasteners have likely failed, and the board may collapse.
-
Persistent dampness: If the ceiling remains cold or damp despite no rain or active plumbing use, you may have hidden condensation issues within your insulation that require an HVAC or roofing specialist.
FAQ Questions
-
Can I use a “paint and primer in one” for water stains? No. These products are not designed to block tannin bleed-through. You must use a dedicated stain-blocking primer first.
-
Why does the new paint look like a different color? Ceiling paint yellows over time due to UV exposure and dust. Unless you repaint the entire ceiling, a patch will almost always be visible under close inspection.
-
How do I know if the drywall is ruined? Press your thumb into the center of the stain. If the drywall feels firm like the rest of the ceiling, it is safe to patch. If it feels soft, mushy, or leaves an indentation, replace it.