
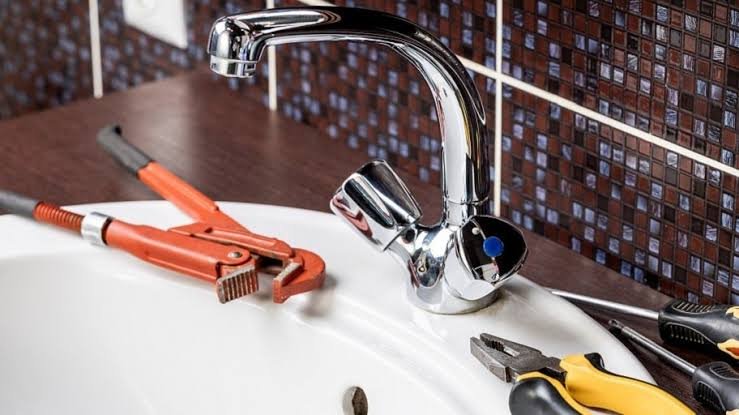
A dripping faucet can sound minor, but a tap that continues to release water after it has been turned off usually has a worn or damaged internal part. On older-style compression taps, the washer is often the part responsible for creating the seal. When that washer becomes hard, cracked, flattened, or damaged, water can continue to pass through the valve.
Replacing a worn tap washer is a relatively small plumbing repair when the tap uses a replaceable washer and the fittings are accessible. It does require care, though. A wrong-size washer, damaged valve seat, or overtightened connection can leave you with the same leak or create another one.
Before starting, identify what type of tap you have. Not every modern faucet uses a traditional washer. Some use cartridges, ceramic discs, or other internal mechanisms that require a different repair.
How a Tap Washer Stops Water From Dripping
A traditional compression tap works by pressing a rubber washer against a valve seat.
When you turn the handle, the internal spindle moves the washer away from the opening, allowing water to flow.
When you turn the handle off, the washer presses against the valve seat and blocks the passage.
The washer is exposed to repeated movement and water pressure. Eventually, it can become worn or lose its ability to seal evenly.
That is when you may notice a slow drip from the spout even though the handle is fully closed.
The important point is that the washer is only one possible cause. If replacing it does not stop the dripping, the valve seat, spindle, cartridge, or another component may also need attention.
First, Identify Whether Your Tap Uses a Washer
Before buying a replacement part, look at the tap design.
Traditional compression taps usually have handles that turn several times from fully open to fully closed. They commonly use a rubber washer attached to a valve mechanism.
Many newer mixer taps use a single lever and cartridge instead. Others use ceramic disc mechanisms.
If your tap has a cartridge rather than a traditional washer, buying a generic rubber washer will not solve the problem.
If you are unsure, identify the tap model and check the manufacturer’s repair information. Taking a photo of the tap and its internal parts after disassembly can also help you keep track of what goes where.
What You Need Before Starting
The exact tools depend on the tap, but a basic washer replacement commonly requires:
- A replacement washer of the correct size and type
- An adjustable wrench or suitable spanner
- A screwdriver
- A cloth
- A small container for screws or other parts
You may also need a replacement screw or retaining component if the original is damaged, although this depends on the tap design.
Do not buy a washer simply because it looks approximately the same size. The diameter, thickness, material, and mounting arrangement all need to be compatible with the tap.
If possible, remove the old washer and use it to identify the replacement.
Turn Off the Water Supply First
Do not begin removing the tap mechanism while the water supply is still pressurized.
Look underneath the sink for the shut-off valve serving the tap. Turn it off carefully.
If there is no local shut-off valve, you may need to isolate the appropriate main water supply according to the plumbing arrangement.
Once the supply is off, open the tap.
Allow the remaining water in the line to drain into the sink.
Then close the tap again.
This reduces the chance of water spraying out when you remove the internal mechanism.
If the shut-off valve is stiff, damaged, or begins leaking when you operate it, do not force it. A faulty isolation valve may need professional attention.
Remove the Tap Handle
Place a cloth over the sink drain before removing small screws or caps. This helps prevent tiny parts from disappearing down the drain.
Depending on the tap, the handle may have a visible screw, a decorative cap, or another retaining mechanism.
Remove the cap carefully if present, then loosen the retaining screw.
Lift the handle away from the tap.
If the handle is stuck, do not twist it aggressively. Older components can become seized through corrosion or mineral buildup.
Forcing a stuck handle can damage the spindle or the tap body.
Remove the Valve Mechanism
With the handle removed, you should be able to see the retaining nut or another component holding the valve mechanism in place.
Use an appropriate wrench to loosen it carefully.
Keep track of the order in which parts are removed.
Once the retaining component is loose, the valve mechanism can usually be lifted or unscrewed from the tap body, depending on the design.
Place removed parts on a clean cloth in the order they came off.
This makes reassembly much easier.
If the mechanism will not move with reasonable force, stop rather than applying excessive pressure. A seized valve may require specialist tools or replacement.
Inspect the Old Washer
Once the valve mechanism is accessible, look at the washer.
A worn washer may show signs such as:
- Cracking
- Flattening
- Hardening
- Splitting
- Uneven wear
- A damaged edge
A washer does not need to look completely destroyed to cause a drip. Even a small defect can prevent it from sealing properly.
Check the washer’s mounting point as well. If the retaining screw is damaged or the washer is not sitting correctly, simply installing another washer without correcting the mounting problem may not solve the leak.
Replace the Washer
Remove the old washer from the valve mechanism.
Clean away loose debris from the area without damaging the metal surface.
Install the replacement washer in the same position as the original.
Make sure it sits flat and is held securely.
Do not use excessive force when tightening the retaining screw or fitting. The washer needs to seal against the valve seat; crushing it can deform the material and interfere with proper operation.
If the replacement washer does not fit correctly, stop and obtain the correct part rather than trying to modify it.
Check the Valve Seat
The washer presses against a surface inside the tap known as the valve seat.
If the seat is damaged, rough, heavily corroded, or covered in significant mineral buildup, a new washer may not seal properly.
This is one reason a dripping tap can continue to leak even after the washer has been replaced.
Do not aggressively scrape the valve seat with an unsuitable tool. Damage to the seating surface can make the leak worse.
If the seat appears badly damaged or you are unsure how it should be restored, professional repair may be appropriate.
Reassemble the Tap
Once the new washer is fitted and the valve mechanism has been inspected, reinstall it carefully.
Make sure it is seated correctly before tightening the retaining component.
Replace the handle and any decorative cap or screw.
Do not overtighten the handle or retaining parts. Tight enough to hold the components securely is usually preferable to applying excessive force.
Before turning the water back on fully, make sure the tap is in the correct position according to the repair instructions.
Turn the Water Back On Slowly
Open the shut-off valve gradually.
Watch the tap and the connections as the water pressure returns.
Check for leaks around the valve mechanism and beneath the sink.
Then close the tap and wait.
If the original drip has stopped, the washer may have been the source of the problem.
If the tap still drips, do not keep tightening the handle harder. Excessive force can damage the new washer and internal components.
Instead, consider whether the valve seat, spindle, or another part may be worn.
What If the Tap Still Drips?
A new washer does not guarantee that every compression tap will stop dripping.
The valve seat may be damaged or uneven.
The spindle may also be worn, particularly on an older tap that has been used for many years.
The washer may be the wrong size or may not be sitting correctly.
There may also be another source of water movement within the tap.
If the leak continues after a correctly fitted replacement washer, the next step should be diagnosis rather than repeatedly replacing washers.
[Internal link opportunity: article about finding the source of a small water leak under a sink]
Common Mistakes to Avoid
One of the most common mistakes is failing to shut off the water before removing the tap mechanism. Even a small tap can release pressurized water unexpectedly.
Another mistake is buying the wrong replacement washer. Similar-looking washers are not necessarily interchangeable.
Do not overtighten the tap handle to compensate for a worn washer. This can damage the internal mechanism and may make future repairs harder.
Avoid forcing seized parts. A damaged tap body can turn a simple washer replacement into a much larger repair.
Do not ignore a dripping tap simply because the leak is small. A continuing drip indicates that the tap is not sealing correctly.
Finally, do not assume every faucet uses a washer. Cartridge and ceramic-disc taps require different repair methods.
When You Should Call a Professional
A worn washer can be a reasonable DIY repair, but there are situations where professional assistance is safer.
Consider contacting a qualified plumber if:
- The water supply cannot be safely shut off.
- The tap body is badly corroded.
- The valve mechanism is seized.
- The tap begins leaking from an unexpected location.
- The valve seat is badly damaged.
- You cannot identify the correct replacement part.
- The tap uses a cartridge or ceramic mechanism you are not comfortable servicing.
- The repair does not stop the leak.
- Water begins leaking into the cabinet or around other plumbing connections.
For renters, check your tenancy arrangements before repairing or replacing plumbing fixtures. The landlord or property manager may be responsible for maintenance.
How to Prevent Tap Washer Problems
A washer is a wear component, so it will eventually need replacement in a traditional compression tap.
Avoid closing the tap with excessive force. The handle only needs to be turned far enough to create the seal.
Do not repeatedly tighten a dripping tap harder. Once the washer is worn, extra force generally does not restore it properly.
Pay attention to changes in the tap. A handle that suddenly feels unusually stiff, loose, or difficult to turn can be an early sign that an internal component needs attention.
When repairing an older tap, inspect the surrounding components rather than replacing only the obvious part. A worn washer combined with a damaged valve seat may require more than one repair.
Frequently Asked Questions
Can I replace a tap washer myself?
If the tap uses a traditional replaceable washer and the water supply can be safely isolated, it can be a reasonable DIY repair. The process requires careful disassembly and the correct replacement part.
How do I know which tap washer to buy?
The safest approach is to identify the tap model or compare the old washer with a replacement from a plumbing supplier. Size, thickness, shape, and mounting method can vary.
Why does my tap still drip after replacing the washer?
The valve seat may be damaged, the washer may be incorrectly fitted, or another internal component may be worn. Replacing the washer again without finding the cause may not solve the problem.
Should I turn the tap tighter to stop the drip?
No. Excessive tightening can damage the washer and internal mechanism. If a tap drips while fully closed, investigate the sealing components instead.
Do modern faucets have tap washers?
Some do, but many modern faucets use cartridges or ceramic-disc mechanisms. The repair method depends on the tap design.
Is a dripping tap an emergency?
A small drip is generally not an emergency, but it should be repaired rather than ignored. If the tap is leaking heavily, water is reaching electrical equipment, or a supply connection is leaking, shut off the water if it is safe to do so and seek professional help.
Final Thoughts
Replacing a worn tap washer can be a straightforward repair when you have a traditional compression tap and the correct replacement part. The most important steps are to isolate the water supply, identify the tap mechanism, replace the washer carefully, and check the valve seat before putting everything back together.
If the tap still drips after a correct washer replacement, the washer may not be the only problem. A damaged valve seat, worn spindle, or different type of tap mechanism may require another repair.
Take your time, avoid forcing old components, and never work on a pressurized water connection if you cannot safely control the supply.