
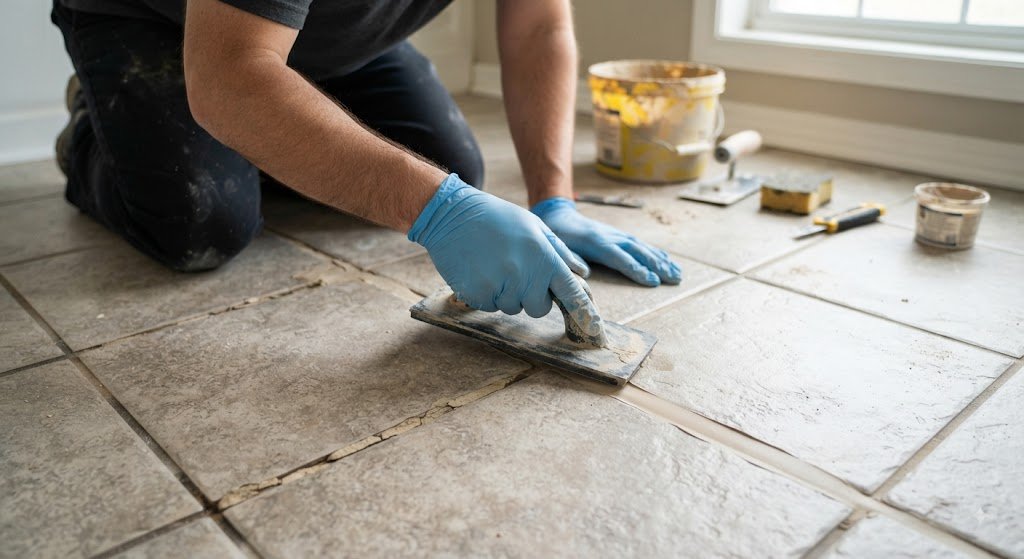
Cracked grout between floor tiles can start as a thin line that is easy to overlook. Over time, however, loose pieces may fall out, dirt can collect in the gaps, and moisture may find its way beneath the tiled surface. The good news is that small areas of damaged grout are often repairable without removing the tiles.
The key is to understand why the grout cracked before simply covering it with new material. Grout can fail because of normal movement, moisture, an unsuitable grout mix, poor installation, or movement in the floor underneath. If the tiles themselves are loose or cracked, replacing the grout alone may not solve the problem.
This guide explains how to inspect cracked grout, remove damaged material safely, apply new grout, and recognize situations where a larger repair may be needed.
What Cracked Grout Between Floor Tiles Usually Means
Grout fills the joints between tiles and helps keep the tiled surface clean and finished. It also helps prevent debris and moisture from entering the spaces between the tiles.
A small crack does not automatically mean the entire floor is failing. Sometimes the problem is limited to a section of grout that has dried out, weakened, or been stressed by minor movement.
Pay attention to the type of damage. A hairline crack running through otherwise firm grout is different from grout that is crumbling, falling out, or separating from the edges of several tiles.
It is also useful to press gently on nearby tiles with your hand or the sole of a clean shoe. A tile that moves, rocks, or sounds noticeably different from neighboring tiles may point to a problem underneath rather than a simple grout defect.
Common Reasons Floor Grout Cracks
Movement in the floor
Tiles and grout can respond differently to movement. A floor may expand and contract slightly with temperature or changes in moisture. Small amounts of movement can put stress on rigid grout.
This is one reason a crack can return even after fresh grout is installed. If the underlying movement has not been addressed, the new material may eventually crack in the same area.
Poor grout installation
Grout that was mixed incorrectly may not perform as intended. Adding too much water, for example, can weaken the finished material.
Problems can also occur if the grout was not packed properly into the joints or if the surface was disturbed before the grout had enough time to cure.
Moisture problems
Repeated exposure to moisture can contribute to deterioration, particularly where water is regularly present. This can happen near bathrooms, kitchens, utility areas, entryways, or floors where spills are common.
Moisture itself is not always the direct cause of a crack, so look for other signs such as crumbling grout, discoloration, a musty smell, or damage extending beyond the grout joints.
Movement of the tiles
If one or more tiles are loose, the grout surrounding them can crack as the tiles shift under normal foot traffic.
This situation requires more than simply filling the crack. The loose tile may need to be removed and properly reset before the joints are regrouted.
Structural or subfloor movement
A recurring crack in roughly the same location may be a sign that the floor underneath is moving. This is more concerning when cracks appear across several joints, tiles are breaking, or doors and other nearby surfaces are also showing signs of movement.
In that situation, replacing grout may only hide the visible symptom temporarily.
What You Can Check Before Repairing the Grout
Before buying materials, inspect the damaged area carefully.
First, clean the floor so dirt does not hide the actual condition of the grout. Avoid soaking the area during this inspection. Once the surface is clean and dry, look closely at the crack.
Check whether the crack is limited to one joint or continues through several joints. Then inspect the nearby tiles for chips, cracks, gaps, or movement.
You should also look at the condition of the grout around the damaged section. If it is hard and firmly attached except for one small crack, a localized repair may be reasonable. If large sections are powdery or missing, a wider regrouting job may be necessary.
If the damaged area is near a plumbing fixture, check whether there is an obvious source of water. A leaking pipe, toilet, appliance, or drain should be dealt with before repairing the grout.
[Internal link opportunity: article about finding small signs of water damage before they become expensive repairs]
How to Fix Small Cracks in Floor Grout
For a small, localized area where the surrounding tiles are firmly in place, repairing the grout is usually a manageable DIY task.
1. Gather the right materials
You will generally need replacement grout suitable for your tile and joint size, a grout removal tool, a small grout float or suitable applicator, a sponge, clean water, and a bucket.
For small repairs, a manual grout removal tool can provide better control than using a power tool. Wear eye protection while removing old grout because small pieces can break loose.
Follow the grout manufacturer’s instructions for mixing, application, and curing. Different grout products can have different requirements.
2. Remove the damaged grout
Do not simply spread new grout over a cracked surface.
Use a grout removal tool to carefully remove the damaged material from the joint. Work slowly so you do not chip the edges of the tiles.
For a small repair, you do not necessarily need to remove every joint on the entire floor. Concentrate on the damaged section while removing enough weak material to create a clean space for the replacement grout.
If the grout crumbles easily as you work, inspect a larger area because the visible crack may not be the only damaged section.
3. Clean the joint
Once the damaged grout has been removed, clear loose dust and debris from the joint.
A soft brush or vacuum can help remove particles. Follow the instructions for your particular grout regarding whether the joint should be completely dry or slightly damp before application.
The goal is to give the new grout a reasonably clean surface to bond against.
4. Mix the grout correctly
If you are using a powdered grout, mix it according to the manufacturer’s instructions.
Avoid adding extra water simply because the mixture appears difficult to spread. The correct consistency depends on the product, and changing the water ratio can affect how the grout sets.
Mix only an amount you can use within the product’s working time. Grout that begins to harden should not simply be brought back to a workable condition by adding more water.
5. Pack the new grout into the joint
Use the appropriate grout float or applicator to press the material firmly into the cleaned joint.
Work across the joint rather than simply brushing material along the crack. The grout needs to fill the space rather than sit as a thin layer on top.
Remove excess grout from the surrounding tile surface while it is still workable. Avoid digging the fresh material back out of the joint.
6. Clean the tile surface
After the grout has been applied according to the product instructions, use a clean, properly damp sponge to remove residue from the tile.
Do not flood the area with water. Excess water can interfere with the fresh grout.
Rinse the sponge frequently and use gentle passes. A light haze may remain after the surface dries, depending on the grout and tile. Follow the product instructions for removing any remaining residue.
7. Allow the repair to cure
Keep foot traffic and moisture away from the repaired area for the period recommended by the grout manufacturer.
It can be tempting to walk across the repair as soon as it looks dry. The surface may appear finished before the grout has fully cured, so give it the required time.
If the floor is in a busy hallway or kitchen, plan the repair for a period when the area can remain undisturbed.
When Replacing Grout Is Not Enough
There are situations where a grout repair is unlikely to solve the underlying problem.
If a tile moves when you step on it, investigate why before regrouting. New grout around a loose tile can crack again because the tile continues to move.
The same applies if several adjacent tiles are cracked or loose. The problem may involve the tile installation, adhesive or mortar beneath the tiles, or movement in the underlying floor.
Recurring cracks deserve attention too. If you repair the same joint repeatedly and the crack keeps returning, stop treating it as a simple cosmetic problem.
A professional may need to inspect the floor to determine whether movement, moisture, installation problems, or another underlying issue is involved.
Common Mistakes to Avoid
One of the most common mistakes is applying new grout directly over cracked or loose old grout. The new material has little chance of providing a lasting repair if the weak material underneath remains.
Another mistake is removing grout too aggressively. Tile edges can chip if a sharp tool is forced against them. Take your time, particularly with ceramic or porcelain tiles that have delicate edges.
Do not mix grout by guesswork. The manufacturer’s directions are there for a reason, and changing the water ratio can affect the final result.
Avoid cleaning fresh grout with excessive water. A very wet sponge can wash material out of the joints before it has properly set.
It is also a mistake to ignore loose tiles, leaks, or repeated cracking. Fresh grout can improve the appearance of the floor, but it cannot correct every underlying problem.
When You Should Call a Professional
A professional inspection is sensible when the damage goes beyond a small grout repair.
Consider getting help if:
- Several tiles are loose, cracked, or moving.
- Grout repeatedly cracks after being repaired.
- Large sections of the floor have damaged or missing grout.
- You suspect water is entering beneath the tile.
- The floor feels uneven or has noticeable movement.
- Cracks extend beyond the grout and into multiple tiles.
- You see significant damage around a toilet, drain, pipe, or other plumbing fixture.
- The repair would involve structural, major plumbing, or other work outside your DIY experience.
For renters, it is also worth reporting recurring floor problems to the landlord or property manager before attempting a repair. You may be responsible for minor maintenance in some rental agreements, while larger flooring problems may need to be handled by the property owner.
How to Prevent Cracked Grout From Returning
Good maintenance starts with keeping the floor in reasonable condition. Clean spills promptly, particularly in areas where water regularly reaches the floor.
Do not use excessive force when cleaning grout. Harsh treatment can gradually damage some grout surfaces, depending on the product and cleaning method.
Pay attention to small changes. A loose tile, a new gap, or a recurring crack is easier to investigate when the problem is still localized.
When installing or replacing grout, use a product appropriate for the tile, joint size, and location. Follow the manufacturer’s mixing, application, curing, and sealing instructions rather than relying on a general rule that applies to every product.
Where movement joints are required, they should not simply be filled with rigid grout. Flexible sealant may be appropriate in certain joints designed to accommodate movement. The correct approach depends on the floor design and product requirements.
Frequently Asked Questions
Can I put new grout over cracked grout?
It is generally better to remove the damaged grout first. New grout placed over weak or cracked material may not bond properly and can fail again.
Why does my new grout keep cracking?
Recurring cracks can result from movement beneath the tiles, loose tiles, moisture, unsuitable installation, or other underlying problems. If the same area repeatedly fails, investigate the cause instead of continually filling the crack.
Do I need to remove all the grout between my floor tiles?
Not always. If the damage is limited to a small area and the surrounding grout is sound, a localized repair may be enough. Larger areas of deterioration may justify removing and replacing more grout.
Can cracked grout cause water damage?
Damaged grout can make it easier for moisture to reach areas beneath the tile, but the amount of risk depends on the floor construction and location. In areas exposed to regular water, investigate any persistent moisture problem rather than relying on grout replacement alone.
Should I seal the new grout?
Some grout products benefit from sealing, while others are designed to be less absorbent or may have different maintenance requirements. Check the manufacturer’s instructions for the specific grout you use.
How long should I wait before walking on repaired grout?
Follow the curing and traffic instructions supplied with the grout. The required time can vary by product and conditions, so do not assume that grout is ready simply because its surface feels dry.
Final Thoughts
A small crack between floor tiles does not always require a major flooring project. If the tiles are stable and the damage is limited, carefully removing the weak grout and replacing it with suitable material can restore the joint and improve the floor’s appearance.
The more important step is checking why the crack appeared. If tiles are moving, moisture is involved, or the same joint keeps failing, the grout may only be showing a deeper problem.
A careful inspection before repairing the joint can save time and prevent you from repeating the same repair later.