
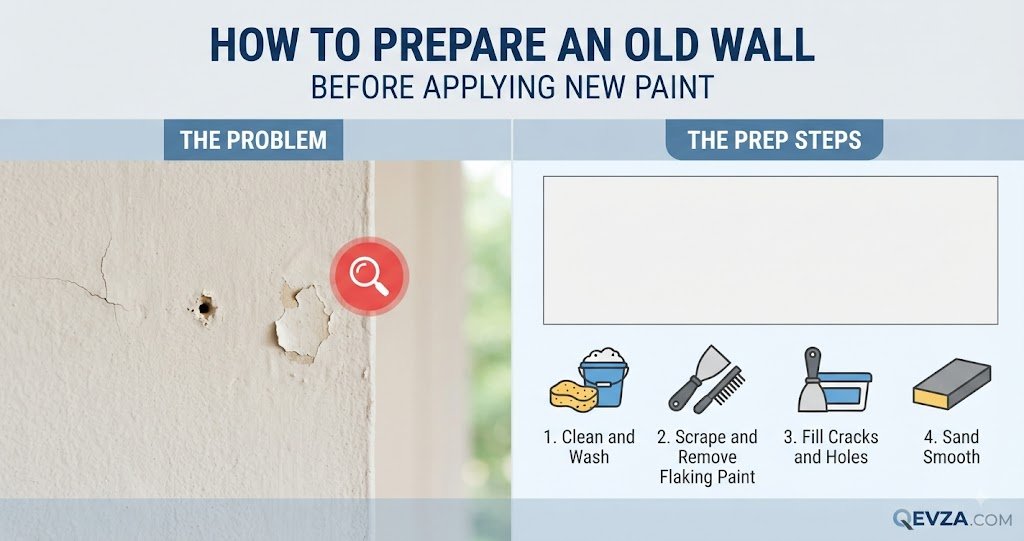
You finish painting a wall, step back, and notice something you didn’t expect. One section looks darker. Another looks dull. You can see roller marks, visible lines, shiny patches, or areas where the color doesn’t seem to match.
It can be frustrating, especially when the paint looked fine while you were applying it.
The good news is that an uneven paint finish does not always mean you need to strip the entire wall and start again. In many cases, the problem can be identified by looking closely at what kind of unevenness you have.
A wall that has visible roller texture needs a different solution from a wall with dull patches. Lap marks need a different approach from poor coverage. And if the wall was repaired before painting, the repair itself may be causing the difference in appearance.
This guide will help you identify the problem first and then choose the least aggressive repair that makes sense.
What Does Uneven Paint Look Like?
“Uneven paint” can describe several different problems.
You may notice:
- darker and lighter areas of the same color
- visible roller lines
- brush marks
- rough or bumpy sections
- shiny patches surrounded by flatter areas
- areas where the old color shows through
- horizontal or vertical lines between painted sections
- obvious patches where repairs were made
- a different appearance around corners and edges
These problems can have different causes.
Before applying another coat, take a few minutes to determine which one you are dealing with. Adding more paint without understanding the problem can sometimes make the finish worse.
First Check: Is the Problem Color, Sheen, or Texture?
This is the simplest way to narrow down the cause.
If the color looks different
The wall may have inconsistent coverage, an unprimed repair, paint that was not mixed properly, or a problem with the previous surface.
If the color is the same but some areas look shinier
The issue may be differences in surface porosity, paint thickness, or sheen.
If you can feel ridges or bumps
The problem is more likely related to the application technique, roller, brush, surface preparation, or buildup of paint.
If you see straight lines
You may be looking at lap marks or an area where one section dried before the next section was blended into it.
Identifying the appearance first prevents you from treating every uneven finish in exactly the same way.
Why Fresh Paint Can Look Uneven
The Wall Was Absorbing Paint Differently in Different Areas
A repaired wall does not always absorb paint at the same rate as an already painted surface.
For example, joint compound or filler used to repair a hole may have a different porosity from the surrounding painted wall.
When paint is applied over both surfaces, the repaired section can absorb the coating differently. After drying, it may look duller or slightly different even though the same paint was used.
This is often called flashing.
The problem is not necessarily the color itself. The surface underneath may simply have a different level of absorption.
The Surface Was Not Properly Prepared
Paint cannot hide every surface problem.
Dust, grease, loose material, chalky old paint, and other contaminants can interfere with the finish. A wall can look reasonably clean while still having enough residue to affect how the new coating behaves.
Before painting, the surface should be appropriately clean, dry, sound, and prepared for the specific product being used.
You Applied Too Much Pressure With the Roller
Pressing hard on a roller may seem like a way to spread paint farther.
It usually isn’t.
Heavy pressure can remove paint from areas that have already been coated and can also create inconsistent roller texture.
A better approach is to allow the roller to distribute the paint without forcing it against the wall.
You Worked Paint After It Started Drying
Paint has a limited working time.
If you repeatedly roll over an area that is beginning to set, you can disturb the surface and leave visible texture.
This is particularly noticeable under strong side lighting.
Once a section has started drying, continuing to work it may create more problems than it solves.
The Paint Was Not Mixed Properly
Paint components can settle while a container is stored.
If the product requires stirring, mix it thoroughly according to the manufacturer’s instructions before and during use as recommended.
This is especially important when using a paint that has been sitting for some time.
If you are using multiple cans of the same color, mixing them together in a larger container can also help reduce small variations between batches when the product instructions allow it.
The Wall Was Painted in Difficult Conditions
Paint needs suitable conditions to dry properly.
Very high heat, direct sunlight, excessive humidity, or strong airflow can change how quickly a coating dries.
For example, if one part of a wall is exposed to strong sunlight while another part remains shaded, the two areas may not dry under the same conditions.
Always check the paint manufacturer’s recommended application conditions instead of assuming every product behaves the same way.
How to Tell If You Have Roller Marks
Stand several feet away from the wall and look across it from different angles.
Then move closer and run your hand gently over the surface.
If you can see repeating raised patterns that match the path of the roller, you may have a texture problem rather than a color problem.
A wrong roller cover, excessive pressure, too much paint, too little paint, or repeatedly working partially dried paint can all contribute to an uneven roller texture.
Don’t immediately sand the entire wall.
First determine whether the texture is actually raised enough to require sanding.
How to Tell If You Have Lap Marks
Lap marks often appear as lines or bands where one painted section overlaps another.
They are particularly noticeable on large walls and in rooms with strong natural or artificial light.
They can happen when part of the wall dries before you return to it with the next section.
The best way to avoid them during painting is to maintain a workable wet edge and plan your sections so you are not leaving large areas to dry before connecting them.
Why Repaired Areas Can Look Different
One of the most common surprises after painting is discovering that a filled hole or repaired crack is still visible.
The repair may feel perfectly smooth when you touch it, yet the painted wall shows a different-looking patch.
This can happen because the repaired material and the surrounding wall absorb paint differently.
The fix is usually not simply another layer of finish paint.
The repaired area may need suitable preparation and primer before the finish coat is applied.
This creates a more consistent surface for the paint.
How to Fix Minor Uneven Paint
If the color is generally correct and the problem is limited to mild roller marks or small variations, don’t immediately strip the wall.
Let the paint dry according to the product instructions first.
Paint can change in appearance as it dries, and judging the finish too early can lead to unnecessary work.
Once it has dried, inspect the wall again.
If the problem is minor and the surface is otherwise sound, a carefully applied additional coat may improve the appearance.
Use the same paint, follow the product instructions, and concentrate on consistent application rather than trying to cover one bad patch with a heavy layer.
How to Fix Visible Roller Texture
If the paint has dried with raised ridges or rough roller texture, adding another coat may simply cover the texture without removing it.
Instead:
1. Let the paint dry completely
Don’t sand paint that is still soft.
The required drying time varies by product and conditions, so follow the label instructions.
2. Lightly smooth the high areas
Use an appropriate fine sanding sponge or sandpaper and work gently.
You are trying to reduce the raised texture, not remove all the paint from the wall.
3. Remove the dust
Dust left on the surface can affect the next coat.
Clean the wall using a method appropriate for the paint and surface, then allow it to dry before continuing.
4. Apply another consistent coat
Use the recommended roller and application method for your paint and wall surface.
Avoid repeatedly going back over sections once the coating begins to set.
How to Fix Dull or Shiny Patches
If the wall has the correct color but some areas look noticeably duller or shinier, inspect the surface underneath.
Pay particular attention to:
- filled holes
- repaired cracks
- areas that were sanded
- bare drywall
- old patches
- areas that were cleaned differently
- sections with different surface textures
If the difference is caused by uneven absorption, suitable primer may be needed before repainting.
For a wall with widespread sheen variation, spot painting can sometimes leave a visible patch even when the color is correct.
In that situation, repainting the affected wall section from one natural stopping point to another can provide a more consistent result.
How to Fix Paint That Looks Patchy
Patchy paint can have several causes.
If you can see the old color through the new coating, the problem may simply be insufficient coverage.
If the color itself looks inconsistent, check whether the paint was thoroughly mixed and whether the wall was evenly prepared.
If certain areas are darker or lighter because the surface beneath them has different porosity, more finish paint may not solve the problem. Those areas may need proper preparation first.
Avoid repeatedly adding coats to one small patch while leaving the rest of the wall untouched. The extra paint can create a thicker area that remains visible under certain lighting.
What to Do When the Problem Is Only Visible in Certain Light
Sometimes a wall looks perfectly acceptable during the day but shows every imperfection when a lamp is turned on.
This happens because light coming across a wall at a shallow angle can highlight tiny differences in texture and sheen.
Before repainting, turn off the strong light source and inspect the wall under normal room lighting.
Then inspect it again from different angles.
If the problem is purely a small surface texture difference, repainting alone may not solve it.
You may need to smooth the surface first.
Should You Sand the Whole Wall?
Usually, no.
Sanding should be based on the actual problem.
If only a few raised areas exist, targeted sanding may be enough.
If the entire wall has significant texture, multiple failed coats, or heavy ridges, more extensive surface preparation may be necessary.
The goal is not to remove paint simply because the finish looks uneven.
The goal is to create a suitable surface for the next coat.
Common Painting Mistakes That Create Uneven Results
Starting and stopping in the middle of a wall
Stopping halfway through a large wall can create visible transitions once the paint dries.
Whenever practical, plan your work so each wall section can be completed without leaving an obvious unfinished edge.
Using too much paint
A heavy coat does not automatically produce better coverage.
Excess paint can increase sagging, texture, and drying problems.
Follow the product’s recommended application method.
Using too little paint
Trying to stretch the paint too far can lead to thin, inconsistent coverage.
Load the roller appropriately and distribute the paint evenly rather than pressing harder to squeeze out every last bit.
Using the wrong roller cover
Different surfaces require different roller textures.
A roller that works well on a smooth wall may not produce the same result on a textured surface.
Check the paint manufacturer’s recommendations and choose a roller suitable for the wall texture.
Painting over an unprepared repair
This is one of the easiest ways to end up with visible patches.
A smooth repair still needs appropriate preparation before the finish coat.
Adding another coat too quickly
Drying time and recoating time are not necessarily identical.
Follow the product instructions and give the previous coat enough time before applying another.
When a Third Coat Is Actually Helpful
A third coat is not automatically a bad idea.
It can help when:
- the previous coats are properly bonded
- the surface is already smooth
- the color needs more consistent coverage
- the paint manufacturer allows another coat
- the problem is mild rather than structural or surface-related
But a third coat will not repair a damaged wall.
It will not remove raised roller marks.
It will not fix a damp surface.
And it will not solve an improperly prepared repair.
Always correct the underlying issue before adding more paint.
How to Get a More Even Finish on Your Next Wall
Start with the surface rather than the paintbrush.
Make sure the wall is clean and sound.
Repair holes and cracks properly.
Prepare repaired areas according to the products being used.
Use the appropriate primer where needed.
Mix the paint thoroughly.
Use a suitable roller and brush.
Apply a consistent amount of paint.
Work in manageable sections.
Keep a wet edge where practical.
Avoid repeatedly working paint that has started to set.
Allow each coat to dry according to the manufacturer’s instructions.
These small details have a much bigger effect on the final appearance than simply buying the most expensive paint.
When You Should Repaint the Entire Wall
A complete wall recoat may make sense when:
- the color coverage is inconsistent across a large area
- multiple touch-ups are visible
- sheen varies across the wall
- the previous application has widespread roller marks
- repaired areas are visible in several places
- the wall has been repeatedly spot-painted
Repainting from corner to corner gives the new coat a consistent starting and stopping point.
It is often more effective than trying to make dozens of small touch-ups disappear.
When the Problem May Be the Wall, Not the Paint
Sometimes you can apply paint correctly and still see imperfections.
If the wall itself is uneven, damaged, heavily textured, or poorly repaired, the paint may simply make those defects easier to notice.
Look across the wall from the side.
If shadows reveal dips, ridges, dents, or other surface defects, painting again may not solve the problem.
The surface may need additional preparation first.
When to Get Professional Help
Consider professional help when the wall has extensive damage, repeated coating failure, significant moisture problems, or a surface condition you cannot identify.
Professional help may also be worthwhile if the wall requires extensive preparation and you are uncomfortable doing drywall, plaster, or other substrate repairs.
If the uneven finish is accompanied by dampness, staining, soft wall material, or recurring damage, investigate the underlying issue before treating it as a painting problem.
A Simple Troubleshooting Guide
If your fresh paint looks uneven, start here.
Color looks patchy:
Check coverage, paint mixing, surface preparation, and repaired areas.
Some sections look duller:
Check surface porosity and whether those areas were properly prepared or primed.
Some sections look shinier:
Check differences in paint thickness, surface texture, and sheen.
You can feel ridges:
Look for roller texture, brush marks, excess paint, or surface imperfections.
You see straight lines:
Check for lap marks and sections that dried before they were properly blended.
A repaired patch is visible:
Check the preparation and priming of the repaired area.
The problem keeps returning:
Stop adding paint and investigate whether the wall has an underlying moisture or surface problem.
Frequently Asked Questions
Why does my fresh paint look patchy after it dries?
Patchiness can result from inconsistent coverage, different surface absorption, inadequate preparation, paint mixing issues, or uneven application. First determine whether the problem is color, sheen, or texture before adding another coat.
Should I apply another coat if my paint looks uneven?
Sometimes. If the wall is properly prepared and the problem is simply incomplete coverage, another coat may improve it. If the problem is raised texture, poor surface preparation, or an underlying wall defect, another coat alone may not help.
Why can I see the areas where I repaired the wall?
Repair materials can absorb paint differently from the surrounding wall. Proper surface preparation and suitable primer can help create a more uniform base before applying the finish coat.
Why does my wall look uneven only at night?
Artificial light, particularly light that shines across the wall at a shallow angle, can highlight small differences in texture and sheen that are difficult to see during the day.
Can roller marks be painted over?
If the marks are very minor, another properly applied coat may reduce their appearance. If the marks are raised, sanding or other surface preparation may be necessary before repainting.
How long should I wait before deciding whether my paint job is uneven?
Follow the paint manufacturer’s drying and recoating instructions. The appearance can change while the coating dries, so judging it too early may lead to unnecessary repairs.
Why does one part of my wall look shinier than another?
Different surface porosity, paint thickness, previous repairs, surface texture, or application conditions can produce differences in sheen.
Should I sand the wall before repainting?
Only when the condition of the surface calls for it. Light sanding can help smooth raised texture or rough areas, but unnecessary sanding can create more work and dust.
Final Thoughts
An uneven paint finish can be annoying, but it is usually easier to solve once you identify exactly what is wrong.
Don’t start by assuming you need another coat.
Look at the wall from different angles. Decide whether the problem is color, sheen, texture, coverage, or surface preparation. Then choose the repair that addresses that specific problem.
Small coverage problems may need another coat. Raised roller marks may need light sanding. Visible repairs may need better preparation and primer. Widespread imperfections may require repainting the entire wall.
And if the wall is damp, damaged, or repeatedly developing the same problem, stop treating the paint as the cause until you have checked what is underneath it.
A smooth-looking wall starts with a sound, properly prepared surface. Good painting technique simply builds on that foundation.